

KATEGORIEN
What Causes Fastener Failure in Concrete, Steel and Wood Projects?
Veröffentlicht: September 22, 2026
Kategorien: Neuigkeiten
Schlagwörter: Nachrichten
A failed fixing can look like a bad fastener, yet the cause may sit in the concrete, steel, wood, tool setting, or installation sequence. Construction fasteners should therefore be reviewed as part of the complete joint. Construction fasteners work only when all of those conditions agree. Qewit supplies fasteners for building and industrial work. This guide follows the joint from selection to the jobsite, helping buyers find the decision that needs to change instead of blaming the first damaged part they see.
Where Does Construction Fastener Failure Begin?
The mistake often happens before anyone picks up the driver. That early check is part of choosing construction fasteners responsibly. The joint was designed around a material or load that was never clearly defined.
Misreading the Substrate
Concrete, structural steel, sheet metal, and wood do not offer the same resistance. A concrete fixing that is appropriate for a sound base may behave differently in cracked, thin, or deteriorated material. A wood screw also depends on grain direction, edge distance, and the condition of the timber. First write down exactly what the construction fasteners will enter.
Matching the Wrong Fastener Type
A screw that forms its own thread is not automatically suitable for a pre-drilled hole, and a bolt-based joint is not interchangeable with a direct fastening job. Compare the fastener’s thread, point, head, length, and intended substrate with the actual assembly. A familiar fastener name is not proof that the fit is right.
Ignoring the Joint as a System
The fastener works with the hole, washer or mating part, tool, and load path. If one part changes, the joint may loosen, pull through, or split the surrounding material. Look at the whole joint. A screw or bolt can look strong and still be the wrong part of the assembly, even when the selected construction fasteners appear suitable.
How Do Concrete, Steel and Wood Fail Differently?
Do not diagnose the joint from one visible mark. A loose head, stripped drive, or pulled fixing tells a different story depending on whether it came from concrete, a steel sheet, or timber. Read the damage together with the material underneath it.
Concrete: Pull-Out, Cracking and Poor Hole Preparation
Ein Hex Head Concrete Bolt may suit the fixing direction, but it cannot repair weak concrete or a badly prepared hole. Look at the base first. Check how the hole was drilled and cleaned, how close it sits to an edge, and how deeply the fixing was installed. If the surrounding concrete is already damaged, a sound location may matter more than another head style.
Before approving a concrete fixing, record the substrate condition and installation evidence: the concrete strength or project-design class, hole diameter, effective embedment, edge distance, cleaning sequence, installation tool setting and observed failure mode. Attach the applicable product drawing, test report and batch traceability record. For a Hex Head Concrete Bolt, these records help separate pull-out, concrete damage and installation error. The values must be confirmed against the product specification and the project requirement.
Steel: Thread Engagement and Sheet Thickness
On steel work, sheet thickness and usable thread engagement need to be known before the carton is opened. A point that enters one sheet neatly may skid, tear the opening, or take too little bite in another stack. Tool access and vibration also change the decision. Buyers can use Stainless Steel Hexagon Pan Head Self-Tapping Screw DIN 7981 as a steel-assembly reference, then compare it with the real stack and driving method.
Wood: Splitting, Stripping and Grain Direction
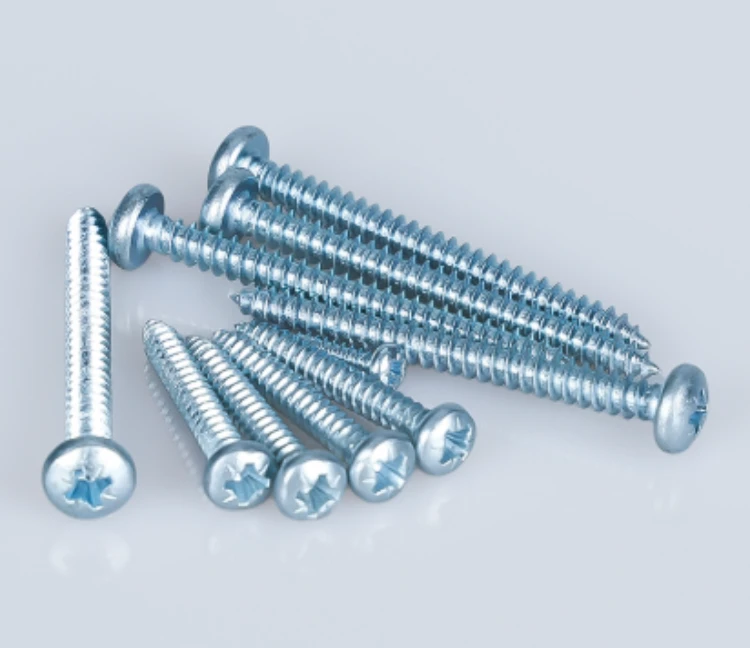
Timber usually warns the installer in a different way: it may split beside the screw, strip in a soft patch, or lose grip after excessive driving. Pilot-hole practice, length, edge distance, and the state of the wood all count. Holzschrauben & Trockenwandschrauben gives buyers a relevant product direction, but solid timber, thin board, and a repaired area should never be treated as the same base.
Which Installation Errors Increase Failure Risk?
Selection is only the beginning. Installation is where the joint either works or starts to fail. The process needs its own checks.
Driving at the Wrong Speed or Angle
Over-driving can damage a head, strip a recess, crush a board, or reduce the useful section of a joint. Driving at an angle can make the fastener miss the intended material path. Set the tool and bit for the product, hold the driver square, and stop when the designed seating point is reached.
Skipping Hole and Surface Checks
Dust, burrs, paint build-up, moisture, and damaged edges can change how a fastener seats. For concrete, hole cleaning and the condition around the opening deserve attention. For steel and wood, surface layers can prevent the head from sitting properly or change the starting resistance.
Using a Tool That Does Not Match the Format
A collated or self-tapping format may need a different feeding and driving arrangement from a loose screw. Tool compatibility affects alignment, repeatability, and the amount of force applied by the operator. Record the approved tool with the fastener specification so a later crew does not substitute by appearance.
How Can Buyers Prevent Repeat Failures?
A prevention routine does not need to be complicated. Put the joint details in writing, approve a matching product, watch the first installations, and keep a record that the next crew can actually use.
Build a Substrate-First Purchasing Brief
Before asking for a quote, put the substrate, thickness, joint, exposure, expected load, tool, quantity, and inspection points on one page. This makes a quote for construction fasteners comparable and prevents a product list from becoming detached from the job. It also gives the supplier enough context to flag a mismatch.
Test the First Installation Under Real Conditions
Use representative material and the intended crew, tool, and installation sequence. Check seating, damage, alignment, and the condition of the surrounding substrate. A small controlled first installation can reveal a problem before the full batch is opened on site.
Document the Failure Mode, Not Just the Complaint
When a joint fails, record whether the fastener bent, pulled out, stripped, corroded, broke, or damaged the substrate. Add photos, installation conditions, product identification, and the point in the process where the issue appeared. A precise record points to a correction. It is more useful than changing products at random.
How Should a Buyer Investigate a Failed Joint?
Preserve the Evidence Before Removal
When a connection gives way, start at the failed joint. Take a photo before removing anything, mark the fastener position, and keep the damaged part if it is safe to do so. Write down whether the trouble appeared while driving, as soon as the load was applied, or only after rain and other exposure. That sequence can point toward the installation, the material, or the joint design.
Separate Product Failure From Installation Failure
The damaged part is not always the part that caused the failure. A rounded recess may come from the bit or the driving angle. A fixing that pulls out raises questions about the base, embedment, and load path. A split board sends the investigation toward edge distance and timber condition. Approve construction fasteners with a short installation note as well as a product name, so the site team knows what may and may not be substituted.
Keep the Specification With the Product
A recurring failure may also expose a handoff problem. The buyer, installer, and inspector may each hold a different part of the specification. Put the substrate, joint type, tool, driving sequence, and inspection point on one work order. The detail then travels with the product instead of being left to memory when the carton reaches the jobsite.
Use the Visible Damage to Guide the Investigation
Stripped recess: check the bit type, driving angle, tool setting and seating point.
Pull-out: check the substrate condition, embedment, edge distance and load path.
Split timber: check grain direction, pilot-hole practice, screw length and edge distance.
Corrosion after exposure: check moisture retention, coating damage, contact metals and cleaning chemicals.
Bent or fractured fastener: check the applied load, material grade, installation force and batch traceability.
For a related decision framework, read Analyse von Schraubenfehlern: Häufige Probleme und wie man sie behebt before finalizing the specification.
Schlussfolgerung
Construction fasteners are suitable only when the substrate, joint geometry, load, exposure and installation method match the product. For concrete, verify base condition, hole preparation and effective embedment. For steel, verify sheet thickness, thread engagement and tool access. For wood, verify grain direction, edge distance and pilot-hole practice. Do not approve a substitute from the product name alone. Before releasing the full batch, complete a representative first installation and record the tool setting, visible damage and inspection result. Use the Kontakt to share the application, quantity, dimensions, and questions before the next review.
FAQ (häufig gestellte Fragen)
Why do fasteners fail in concrete?
Common causes include weak or damaged concrete, poor hole preparation, unsuitable fastener selection, insufficient installation control, and inadequate edge distance. Check the complete fixing rather than the bolt alone.
Can one fastener work in concrete, steel and wood?
No single product should be assumed to suit all three substrates. Compare the thread, point, length, installation method, and expected load with the actual material.
How can a buyer investigate a fastener failure?
Record the substrate, product, tool, installation sequence, visible damage, and load or exposure. This information helps separate a product mismatch from a process or substrate problem.


