

caTEGORIES
Tags
How to Replace a Socket Screw in Industrial Equipment Safely
Posted: August 22, 2025
Categories: News
Replacing a socket screw on a piece of industrial equipment sounds straightforward—until it isn’t. If you’ve ever dealt with one that’s rusted solid, stripped beyond recognition, or buried behind a tangle of hydraulic lines, you know it’s not always a five-minute job. In a busy plant, a stuck screw can mean an hour’s delay or a whole shift gone sideways. So, here’s a walk-through from the perspective of someone who’s actually been elbow-deep in machine frames, not just reading an instruction sheet.
Safety First — Really
Yes, everyone says it, but there’s a reason. Shut down the machine. And not just hit the stop button—pull the main breaker, unplug it, slap on a lockout tag if your site uses them. I’ve seen people lean in to remove a panel only to have the motor kick on because someone else hit the start switch. Scary stuff.
Make sure the equipment is stable. A guard door swinging shut unexpectedly can give you a nasty pinch. And put on your gear—gloves, goggles, maybe ear protection if you’re working near running lines. Trust me, you’ll only take a metal shaving to the eye once before you make it a habit.
Take a Minute to Look Before You Touch
Spend thirty seconds looking at what you’re dealing with. Is the socket screw shiny and new, or dull with corrosion? Is it flush with the surface or sitting inside a deep recess that your Allen key barely reaches?
Sometimes the issue isn’t the screw—it’s the location. I once worked on a bottling line where the screw was behind a conveyor frame and under a sensor arm. The only way in was with a ball-end hex key, at a weird angle, while lying on the floor. Not glamorous, but that’s reality.
Loosening a Stubborn One
Penetrating oil is your first friend. Give it a few squirts, then go get a coffee. Let it soak for 15 minutes, longer if the screw looks ancient. In some old repair shops, they still use kerosene—it stinks and gets everywhere, but it does creep into threads nicely.
If the head’s stripped, try the rubber band trick. Put a flat, wide rubber band over the screw, press your hex bit into it, and turn. It gives just enough grip to sometimes catch. Not a miracle, but it’s worth trying before you drag out the heavy artillery.
Tools That Actually Work
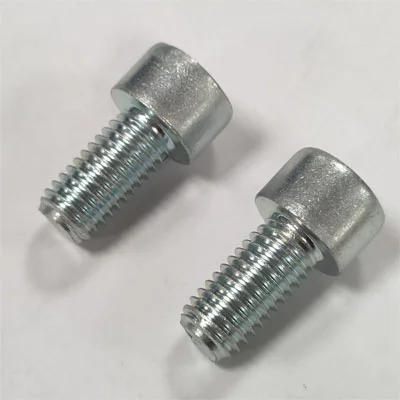
Match your tool to the job. Socket screws, especially the high-tensile ones we ship at Qewitco, are made for torque, so the right size hex key is non-negotiable. Too small and you’ll round the head, too big and—well—you just won’t get it in.
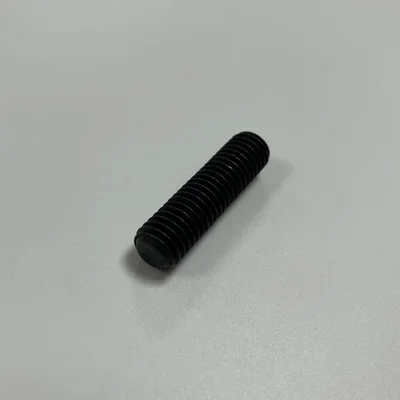
For tamper-resistant socket screws (those with a pin in the middle), you’ll need the right security key. Keep a set in your kit; they’re cheap and save a lot of swearing.
When the usual approach fails:
Screw extractor kit: Drill a pilot hole, insert the reverse-thread extractor, turn counter-clockwise.
Hammer-driven impact wrench: The shock + twist combo can break rust bonds in seconds.
T-handle hex wrench: Better control and torque than a small L-key, and easier on your wrists.
When It Gets Ugly
Sometimes the screw is basically welded in place by corrosion. Then you drill. Start with a bit just smaller than the screw diameter, go slow, keep it straight. Crooked drilling is a quick way to ruin the threads.
Heat is another trick—warm the metal around the screw so it expands. But watch out for nearby seals, plastic covers, or paint; you don’t want to trade one problem for another.
Out With the Old, In With the New
Once the screw is out, clean the threads in the hole. Compressed air, a small wire brush—whatever works. If the threads are damaged, re-tap them.
Replacement choice matters. Match the material, grade, and finish. In Qewitco’s range, we’ve got carbon steel, stainless steel, brass, alloys—plus finishes from zinc flake to hot-dip galvanizing. If your machine sits in a humid or outdoor environment, A2 or A4 stainless with corrosion-resistant coating will outlast plain steel many times over.
If vibration’s a problem, a dab of thread-locker keeps things tight. If you know you’ll need to take it out again later, use anti-seize instead. And torque it right—not “until it feels tight” but to spec. Over-tightening can strip threads or crack parts.
Test It Before You Leave
Check the fit. Give the part a wiggle. If it’s a moving assembly, run it at slow speed first. I once saw a conveyor guard bolt shake loose during full operation—it clanged down, scared half the crew, and stopped the line. Not something you want on your shift.
Make a note in your maintenance log. If you replace the same screw twice in a few months, that’s a clue something else is going on—vibration, misalignment, or just a poor choice of material.
Quick Troubleshooting Table
| Problem | Likely Cause | Fix |
|---|---|---|
| Allen key slips | Wrong size or worn tool | Use correct size, replace the bit |
| Screw won’t budge | Corrosion or thread-locker | Penetrating oil, impact driver |
| Head stripped | Wrong tool or over-torque | Rubber band trick, extractor |
| Screw breaks | Fatigue or rust | Drill out, re-tap hole |
Wrap-Up
Replacing a socket screw isn’t glamorous, but it’s one of those small jobs that keep big machines running. Do it with the right tools, some patience, and the right hardware, and you’ll save yourself (and your shift) a lot of trouble. And when you’re ordering replacements, go for consistent quality. Qewitco’s been shipping industrial-grade fasteners worldwide since 2004—we know a thing or two about screws that stay put.
Contact Qewit today for safer socket screw.
FAQs
Q1. Can I reuse an old socket screw?
A: If it’s clean, undamaged, and from a non-critical application—maybe. For safety parts, always replace.
Q2. How do I stop socket screws from seizing?
A: Use anti-seize during install, and choose materials and coatings that fit the environment.
Q3. Which grade should I pick for replacement?
A: Follow your equipment manual. We stock grades from 8.8 carbon steel to 12.9 high-tensile and multiple stainless options.


