

CATEGORÍAS
Etiquetas
Cómo instalar correctamente los tornillos de fijación de cabeza hueca: tipos de punta, par de apriete y errores comunes.
Publicado: 7 de agosto de 2026
Categorías: Noticias
Etiquetas: noticias
Para instalar correctamente los tornillos de fijación, asegúrese de que el tipo de punta coincida con la superficie de contacto y, a continuación, verifique la rosca, la longitud, el material, la alineación y el método de apriete. Inicie el enroscado a mano, utilice la llave hexagonal adecuada y apriételo con el par de apriete verificado para el montaje final. Esta guía se refiere a los tornillos de fijación hexagonales sin cabeza que se utilizan en ejes, collares, manijas y piezas de maquinaria, no a los tornillos de fijación hexagonales con rosca completa.
¿Qué tipo de punta debe elegir antes de instalar los tornillos de fijación?
La selección de la punta influye en la sujeción, el marcado de la superficie, el ajuste y la extracción. Una punta adecuada para un eje endurecido puede no serlo para una superficie acabada que debe permanecer sin marcas.
Qewit Suministramos tornillos de cabeza hueca en diferentes estándares, materiales y acabados, y ofrecemos asistencia para muestras, producción no estándar, inspección y documentación del proyecto. Por lo tanto, los compradores deben especificar el punto, el material y la longitud en función del componente de acoplamiento y el plan de mantenimiento, en lugar de realizar el pedido únicamente por diámetro.
Punta de copa DIN 916 para sujeción de uso general
Una punta cóncava concentra el contacto alrededor de su borde y es adecuada para muchos ejes, collares, manijas y conjuntos de máquinas donde se acepta una pequeña marca de contacto. Conjunto de tornillos de enchufe hexagonal Punto de copa plano DIN 916 Cumple con las normas DIN 916 e ISO 4029. Qewit ofrece opciones de acero al carbono y acero inoxidable de M2 a M24, incluyendo A2-50, A2-70 y A4-70, además de acabados en color natural y óxido negro. Antes de seleccionar, verifique la dureza del eje, la vibración y la posibilidad de reposicionamiento futuro.
Punta plana DIN 913 para ensamblajes sensibles a la superficie
Una punta plana distribuye el contacto de manera más uniforme y puede ser adecuada para componentes que se pueden ajustar o quitar. Tornillos prisioneros de cabeza hexagonal con punta plana DIN 913 Está homologado según las normas DIN 913 e ISO 4026 en tamaños M2 a M24, con longitudes de 4 a 60 mm. Entre las opciones disponibles se incluyen acero al carbono, acero inoxidable, óxido negro y acabados lisos. Resulta útil para componentes acabados, pero la reducción del marcado no garantiza automáticamente una resistencia suficiente al movimiento.
Una matriz práctica de selección de puntos
La decisión sobre si utilizar un tornillo de fijación con punta cóncava o plana debe basarse en las condiciones de contacto reales.
| Problema de selección | Punto de la taza | Punto plano |
|---|---|---|
| Marcado de superficies | Más probable | Menos concentrado |
| Reposicionamiento | Compruebe las marcas de contacto existentes. | Por lo general, es más fácil de manejar. |
| Uso típico | Ejes, collares, piezas de máquinas | Piezas terminadas o ajustables |
| Verificación principal del comprador | Dureza y vibración del eje | Acción de retención requerida |
Otras formas de cabeza y punta aparecen en Qewit. Tornillo de cabeza huecas rango.
¿Qué debe comprobar antes de la instalación?
Muchos fallos atribuidos al par de apriete comienzan antes. Un paso incorrecto, un mal acoplamiento, un casquillo dañado, un acabado inadecuado o una mala alineación pueden impedir un apriete controlado.
Tamaño, longitud y acoplamiento de rosca correctos
Verifique el diámetro y el paso de rosca con respecto al orificio roscado. El tornillo debe enroscarse lo suficiente, permitiendo que la punta alcance la superficie deseada. Un tornillo corto podría no llegar al eje; uno innecesariamente largo podría sobresalir o interferir con las piezas cercanas. Para elegir la longitud adecuada del tornillo de fijación, siempre se debe comenzar con el plano de ingeniería, la profundidad del orificio roscado y la geometría de contacto.
Compatibilidad de materiales y acabados
El acero al carbono ofrece una amplia gama de resistencia a un costo económico, pero requiere una protección adecuada en presencia de humedad. El acero inoxidable es más apropiado cuando la exposición a la corrosión es un factor importante. El óxido negro proporciona una superficie oscura y una protección limitada contra la oxidación, por lo que las condiciones de almacenamiento, lubricación y operación siguen siendo cruciales. Considere también el contacto entre metales diferentes y el posible agarrotamiento de las roscas en los ensamblajes de acero inoxidable.
Roscas limpias, herramientas correctas y alineación precisa.
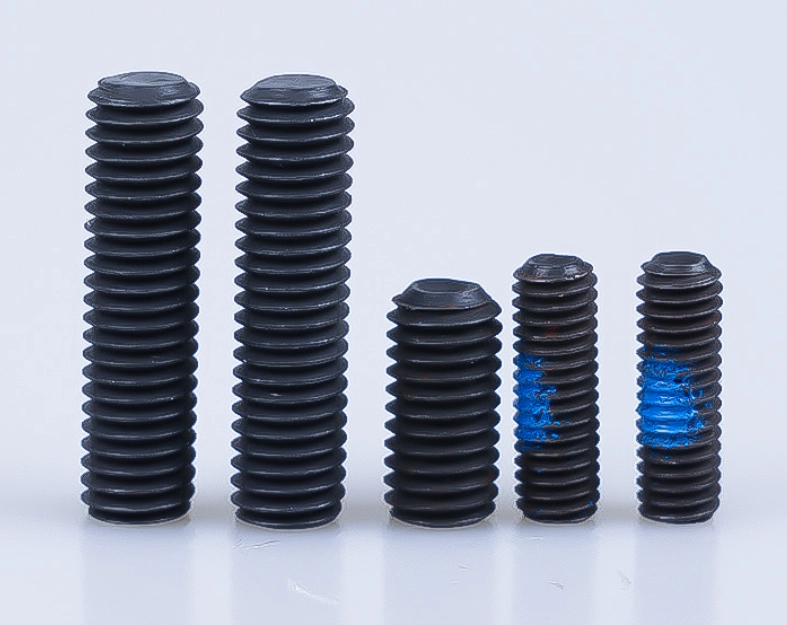
Elimine las virutas, la suciedad, el compuesto de fijación antiguo y el aceite pesado que puedan alterar la fricción de la rosca. Utilice la llave Allen correcta para el tamaño del tornillo de fijación y reemplace las herramientas desgastadas antes de que los bordes redondeados dañen el casquillo. Alinee el orificio con la superficie plana del eje, la hendidura o el área de contacto especificada. Instrucciones para la instalación de los tornillos de fijación Proporcionar una lista de verificación más amplia para herramientas, preparación del espacio de trabajo, alineación y errores básicos de apriete.
¿Cómo se deben instalar los tornillos de fijación paso a paso?
Una vez confirmadas las especificaciones y la posición de contacto, la instalación debe ser controlada y repetible. En este proceso, los operarios instalan los tornillos de fijación sin dañar la rosca, la base ni desplazar la pieza de acoplamiento.
Comience a mano y coloque el punto
Sujete los componentes en su posición final y gire el tornillo a mano las primeras vueltas. Deténgase inmediatamente si encuentra resistencia. Continúe hasta que la punta alcance la superficie deseada. Compruebe que la punta cóncava no esté apoyada sobre un borde y que la punta plana no esté inclinada sobre una superficie curva o irregular.
Apriete gradualmente hasta alcanzar el par de apriete especificado.
Aumente la fuerza con una llave hexagonal completamente insertada o una herramienta de torsión calibrada. Una guía de torsión para tornillos de fijación debe tener en cuenta el tamaño, el material, la lubricación, el acoplamiento de la rosca y el componente conectado. No existe un valor único y seguro para cada conjunto. El fijador de roscas puede ser útil en condiciones de vibración, pero no sustituye el punto de apriete correcto, la limpieza de las roscas, el acoplamiento adecuado ni la verificación del par de apriete.
Inspeccione el ensamblaje final y vuelva a comprobarlo.
Confirme que el componente no se haya desplazado y que el alojamiento permanezca intacto. El tornillo no debe sobresalir hacia el recorrido de otra pieza. En equipos giratorios o vibratorios, revise la unión después de la operación inicial según el plan de mantenimiento. Registre la norma, el tamaño, el material, el tipo de punta y la fuente de torque para la producción repetida.
¿Qué errores de instalación provocan que fallen los tornillos de fijación?
Una junta floja o dañada suele reflejar varios errores menores. Compruebe conjuntamente el apriete, la selección de puntos, la alineación, la reutilización y el control de vibraciones.
Apretar demasiado, apretar demasiado poco y daños en el enchufe
Un apriete excesivo puede deformar el casquillo, dañar el orificio roscado o marcar el eje demasiado profundamente. Un apriete insuficiente puede provocar micromovimientos. Una llave hexagonal de tamaño insuficiente o redondeada dificulta la detección de ambos problemas, ya que el deslizamiento de la herramienta puede confundirse con el apriete final. Deje de usar el tornillo cuando el casquillo comience a redondearse.
Elección incorrecta del punto, mala alineación y daños en la superficie.
Una punta elegida únicamente para el agarre puede dañar el eje acabado. Una punta plana elegida solo para proteger la superficie puede no cumplir con los requisitos de posicionamiento de un conjunto vibratorio. Una alineación incorrecta puede colocar la punta en el borde de un orificio o en una zona de transición. Antes de que los operarios instalen los tornillos de fijación, verifique la posición de contacto en la pieza real, no solo en el dibujo.
Vibración incontrolada y reutilización innecesaria
Para evitar que los tornillos de fijación se aflojen bajo cargas dinámicas, los equipos de ingeniería deben evaluar el conjunto completo de la unión. Un simple aumento del par de apriete puede dañar la rosca o el alojamiento. Verifique el tipo de punta, la preparación del eje, el ajuste de la rosca, la presencia de un parche de bloqueo o un fijador de roscas compatible, y los intervalos de inspección. Tras la extracción, examine las roscas, el alojamiento y la punta. No vuelva a colocar un tornillo visiblemente deformado en un conjunto crítico.
¿Qué deben confirmar los compradores con Qewit antes de realizar un pedido?
La uniformidad de la instalación depende de la precisión en la compra. Una consulta completa debe especificar el estándar, el tipo de punta, la rosca, el paso, la longitud, el material, el acabado, la cantidad, el embalaje y los requisitos de inspección.
Haga coincidir la norma DIN 916 o DIN 913 con la aplicación.
Los productos con punta cónica DIN 916 son adecuados para numerosas aplicaciones en ejes y collarines donde se acepta el marcado local. Los productos con punta plana DIN 913 son una opción a considerar cuando la protección de la superficie o los ajustes repetidos son importantes. Los compradores deben proporcionar el material de contacto, las condiciones de funcionamiento y el plano de montaje, si están disponibles. Para otros tipos de punta, consulte la categoría de tornillos de cabeza hueca en lugar de imponer una norma específica en cada proyecto.
Verificar materiales, acabados, muestras y documentos de inspección.
El servicio de Qewit abarca productos no estándar fabricados según planos o muestras, opciones de tratamiento superficial, parches de bloqueo, clasificación por rodillos u óptica, y muestras de preproducción o preenvío. La documentación disponible bajo solicitud incluye la certificación DIN EN 10204 3.1, ISIR y PPAP hasta el nivel 3. Es fundamental acordar estos requisitos antes de la producción, ya que la trazabilidad, la inspección, el embalaje y la documentación influyen en el proceso de pedido.
Utilice el soporte técnico, los servicios personalizados y el contacto directo.
Cuando la aplicación combine vibraciones, exposición a la corrosión, espacio limitado o una longitud no estándar, proporcione detalles de funcionamiento en lugar de solicitar tornillos de fijación estándar. Qewit puede revisar la norma, el material, el acabado, el parcheo, la clasificación, las muestras y la documentación solicitadas. Su servicio también incluye soporte técnico, gestión de cuentas, control de calidad, consolidación de mercancías y embalaje seguro.
La selección correcta del punto, las roscas limpias, la alineación precisa y el par controlado forman un solo proceso. Los equipos que instalan tornillos de fijación de forma consistente también documentan qué usaron y por qué. Para la selección de puntos poco clara, los requisitos de los planos, la aprobación de muestras o los documentos de inspección, utilice Qewit. contacto página e incluir la aplicación, estándar, rosca, longitud, material, acabado, cantidad y registros requeridos.
Preguntas frecuentes
P: ¿Cómo se instalan los tornillos de fijación sin dañar la rosca del casquillo?
A: Comience a mano, use una llave hexagonal limpia que encaje perfectamente en el casquillo, mantenga la herramienta alineada y apriete gradualmente. Deténgase si la herramienta resbala o si los bordes del casquillo comienzan a redondearse.
P: ¿Qué tan apretado debe estar un tornillo de fijación de cabeza hexagonal?
A: Utilice el par de apriete especificado en el plano, por el fabricante del equipo o en un procedimiento de montaje validado. El diámetro por sí solo no es suficiente, ya que el material, la lubricación, el acoplamiento, el tipo de punta y el componente de acoplamiento influyen en el resultado.
P: ¿Es necesario usar fijador de roscas al instalar tornillos de fijación en equipos vibratorios?
R: No en todos los ensamblajes. Primero verifique el tipo de punta, el ajuste de la rosca, la posición de contacto y el par de apriete. Se puede agregar un compuesto o parche de fijación adecuado cuando las vibraciones y los requisitos de mantenimiento lo justifiquen.


